This post contains affiliate links. When you buy through our links, we may earn a commission.

How to clean rust from canning jars? Guide to cleaning and maintaining your jars to keep them looking new!
Preserving jars are essential for food preservation.
They come in different sizes and shapes, from the perfect large jars to small glass jars with an iron frame to ensure a snap closure. But there are also other closing systems such as screw-top jars.
How to clean them properly?
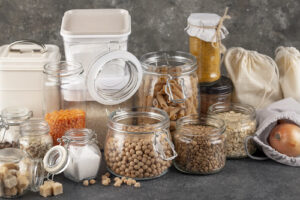 Preserving jars are useful for storing jams, pickles, sauces and other foods. They are also great for storing meat, fish, vegetables, fruit and even eggs.
Large jars can also be used for grocery storage, convenient when buying grains and legumes in bulk.
It is important to clean them regularly as they can get dirty over time and your food stored in the jars may be unfit for consumption.
Whether your jars are purchased used or just old and rusty, they’ll be looking like new again in no time if you follow our tips for cleaning canning jars!
How do I properly clean canning jars?
You have found old, dusty and rusty jars in your cellar or someone gave them to you as a gift? It’s not easy to recover the dirt and imagine using them in the kitchen to put food in!
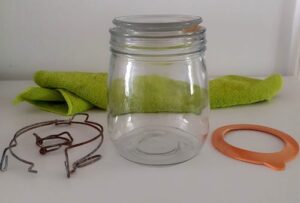 You think that they are not recoverable and that it is better to throw them away? Well, no!
There are several ways to clean and recover disastrous canning jars.
After a quick inspection, you may notice rust on the metal frame of the jar and dirt or mold on the body of the jar, the lid and the rubber seal.
To properly wash the jars, you need to proceed methodically and clean each part of the jar: the metal part, the glass part and the rubber part.
How to clean rust from jars?
► STEP 1 Dismantling the jar
We need to dismantle the jar mount to be able to clean the metal part.
The metal frame is not fixed, you can easily detach it from the jar and its lid. Simply squeeze the ends of the frame slightly to release it from the container. This makes it much easier to clean the metal part properly.
► STEP 2 Remove the excess rust from the frame
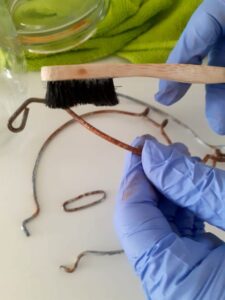 Let’s take care of removing the rust on the frame. Does rust on the metal mean that the can is of poor quality? Well no, the rust that appears on the frame is quite predictable over time.
A little chemistry to explain the phenomenon. When handling cans, the frame is systematically in contact with water.
Water is composed of oxygen and hydrogen. Once the metal is in contact with water, the metal will bind to the oxygen to form iron oxide, a brownish-orange deposit that is also called rust.
There are 2 ways to do this, depending on the material you have on hand:
-
-
- Using an old toothbrush, you will remove the excess dust and rust from the mount. This is done with a dry cleaning process.
- If you have a metal kitchen sponge, you can easily scrape off the rust deposit. The metal sponge is very effective and is a must have in the sink!
-
► STEP 3 Clean the jar frame
There are 3 effective green solutions depending on what you have available at home: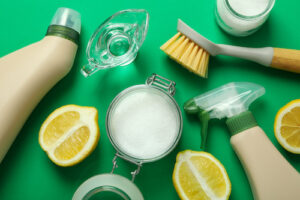
- Cleaning the jar mount with vinegar and baking soda powder
- In a deep dish, pour the equivalent of 25cl of white household vinegar.
- Dip the frame in the bottom of the plate so that it is submerged and then sprinkle the whole with bicarbonate. The vinegar and bicarbonate will create a reaction together that will activate the solution.
- Leave to soak for 1 hour to allow the solution to take effect.
- Then remove the frame to rinse and dry.
- Cleaning the frame of the jar with coca-cola
If you have any Coca-Cola left, don’t hesitate to soak the frame in it. The acidity of the Coca-Cola and the air bubbles will create a reaction that will scour and facilitate the removal of rust. - Cleaning the frame of the jar with lemon and salt
These 2 ingredients combined are very effective in removing rust from metal. Simply open a lemon, put some fine salt on it and rub directly on the metal for an effective cleaning.
How do I clean the glass jar and lid?
Either put the glass parts in the dishwasher. Or clean in hot water with dishwashing liquid.
Soak and rinse. If there is dirt or mildew in the jar, the soaking time will allow the stains to come off the wall.
Your container has a bad smell? After cleaning, simply soak it in a vinegar solution, half cold water, half vinegar. White vinegar has disinfectant properties and is very effective in removing bad odors.
For screw-top jars, the cleaning of the lid must be particularly careful since dirt can easily settle inside the lid and its corners.
Cleaning the rubber seal
Gaskets are made of rubber and no matter what you do, the rubber gets impregnated with odors. The rubber seals must be changed regularly because they ensure the tightness of the pressure seal jars. A poor seal can result in a failure to preserve your preparation.
However, if the seal is not visually damaged the first time it is possible to use it again. If the seal is broken, it is no longer usable and must be replaced.
The gasket should be cleaned by hand with soapy water and not in the dishwasher as there is a risk that the gasket will be deformed by the heat.
A few minutes before stopping the sterilization, you can dip them in the sterilizer or put them in the oven for a few moments in order to sterilize them and avoid the development of bacteria during the canning.
The 3 parts of the jar are now well cleaned, you just have to reinstall the mount and make sure it works properly to close your jar and ensure the seal as on the first day.
How to maintain the jars?
- Make sure to store them in a dust-free place, but before each use it is best to wash your jars. Washing your canning jars is very simple. All you need is hot water and soap or dishwashing liquid.
- Dry the lids and seals on a towel or paper towel. Dry them thoroughly to prevent oxidation.
- To protect the metal from oxidation, you can apply cooking oil to the metal parts. The oil will create a protective barrier and thus better preserve your jars.
Is it necessary to sterilize the jars?
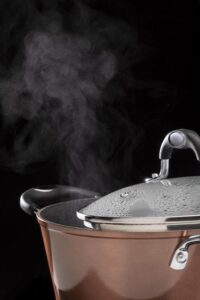 It is important to sterilize the jars each time they are used to ensure that the jars are ready to use and that the food can be stored safely without the risk of developing bacteria.
Traditionally, canning jars are boiled and sterilized before canning. Many people ask if it is necessary to sterilize the jars once they are filled, if they are sterilized anyway.
The answer is yes, sterilizing the filled jars is essential before preserving your food, cooking will release the air still contained in the jar and thus preserve your preparations.
How do you quickly sterilize the jars?
We present you 2 methods to sterilize vacuum jars.
- The classic method is sterilization in a pot filled with water to immerse the jars.
- The second method we prefer is sterilization in an oven at 212°F for 20 minutes. This method is easy and quick to set up.
Conclusion:
Don’t throw away your canning jars because there are solutions to everything! Cleaning your old jars will save you from spending unnecessary money.
You can easily clean your food containers in an environmentally friendly way without using chemicals that are harmful to your health and the environment.
All you need are a few ingredients that you already have in your cupboard.
Frequently asked questions (FAQ)
What happens if you don't sterilize the canning jars?
The only thing that will happen is that the food in your jar will not be safe to eat. Canning requires a few hygienic rules to ensure that the result of your canning is not a failure.
Why can't I reuse the lids of canning jars?
It is fine to reuse the screw-on lids of your jars. However, you must make sure that they are still in good condition and that they close properly so that the jar is airtight.
Can we disinfect the jars with bleach?
We strongly recommend that you do not use bleach to clean any type of foodware. Bleach is a 99% disinfectant, but there are other ways to clean and disinfect jars that are less harmful to your health and more ecological. Read our article!
